

I-3 Eclipse Plugin Installation
Installation from an Update Site
Install the plugin for handling generation of XML files and running models from the menu with a right mouse click in the Eclipse Package Explorer View, from the update site.
Firewall
If your firewall settings prevent you from connecting to the
"Update Site", then please open
[Window]->[Preferences...]->[Install/Update], and put a check in [Enable HTTP proxy connection] in the proxy settings
section, and set the address and port to match your network environment.
If you are unable to connect, please carry out an install using the zip pack below.
If you are unable to connect, please carry out an install using the zip pack below.
The procedure on Eclipse 3.2.1 is as below.
- From the Eclipse menu select [Help]->[Software Updates]->[Find and Install...].
- Check [Search for new features to install], and click on [Next].
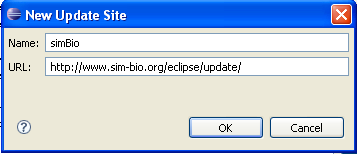
- Click on [New Remote Site...].
- In the New Update Site dialog, enter
simBio or some other name that you like in the [Name:] field and the address
http://www.sim-bio.org/eclipse/update/ in the [URL:] field, then click on [OK].
- Check [smBio], then click [Finish]
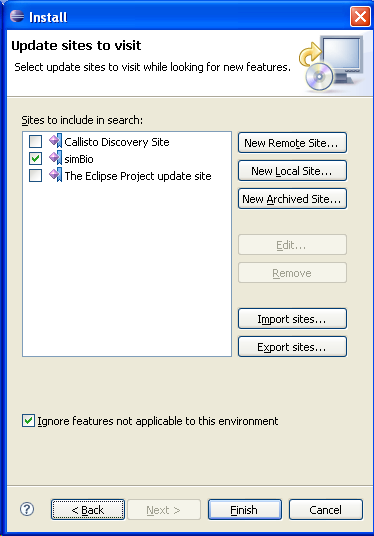
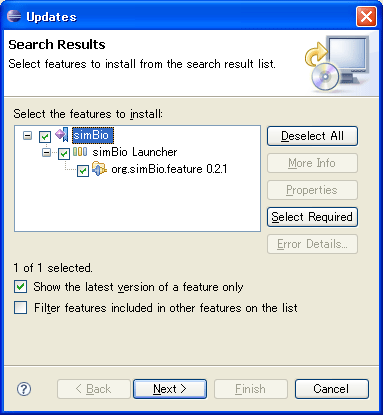
- The installation dialog will appear, so check [simBio], and click on [Next].
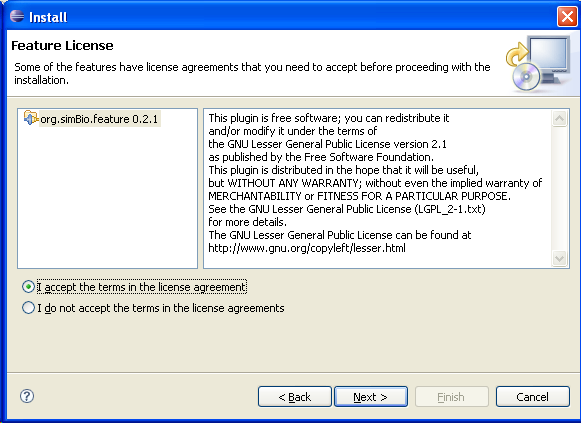
- Accept the license, then click on [Next >]
- Click on [Finish].
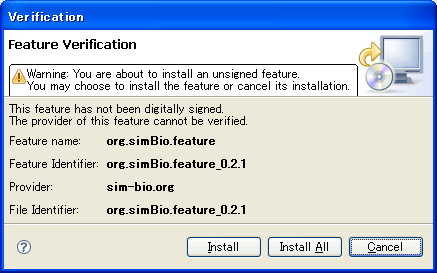
- When the inspection dialog appears, click on [Install All].
- When the Install/Update dialog appears, click on [Yes] or [Apply Changes].
Install from zip pack
If you cannot connect to the update site from Eclipse, access the SourceForge simBio download page and download simBio.Eclipse.Plug-in-*.bin.zip, and extract it to the Eclipse folder (c:\eclipse).
Files will be created in the following two folders.
- C:\eclipse\features\org.simBio.feature_*
- C:\eclipse\plugins\org.simBio.eclipse_*